Did you know that you can have zero downtime deployments with your ASP.NET application?
You don’t even need to be using AWS or Azure, or have a fancy load balancer or anything else clever and expensive! So how does this thing work?
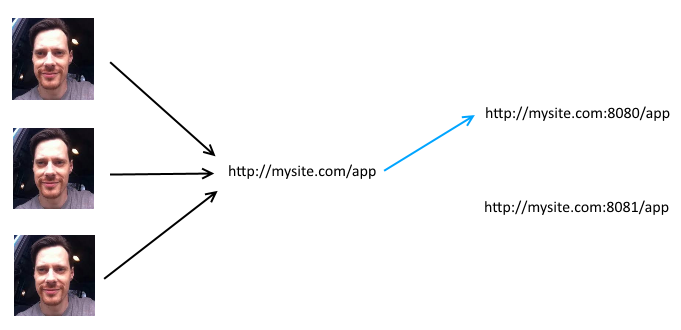
The basic idea is that you have two instances of your app running in production. At any point in time your users are using only one of these instances, and when you do a deploy you update the instance that isn’t being used. Then you switch the users over to the new instance. See that blue line? That’s a reverse proxy.
Martin Fowler (genius) calls this Blue-green deployments.
So how do I do this?
Well, before we can proceed, perhaps there should be a few pre-requisites listed:
- ARR needs to be installed on your server. This is what does the live switcher.
- Your app can't be using InProc for Session State. You can use either StateServer, SQLServer or your own custom provider if you really want.
- All code written from now on must be backwards compatible with earlier versions. If you're calling a web service, that web service can't suddenly have a new mandatory field. It needs to be optional and it still needs to work if it's not set.
- All database schema changes must be separate from application releases. You don't want to tightly couple your database changes and your deploys, do you?
So... HOW DO I DO THIS?
Ok. First off, install Application Request Routing, or ARR for short.</a>
Great. Now, add two new sites within IIS and bind them to different ports:
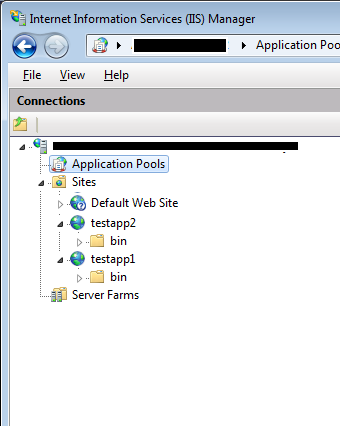
I suggest ports 8080 and 8081. If all has gone according to plan, you should be able to open them both up in your web browser like so:
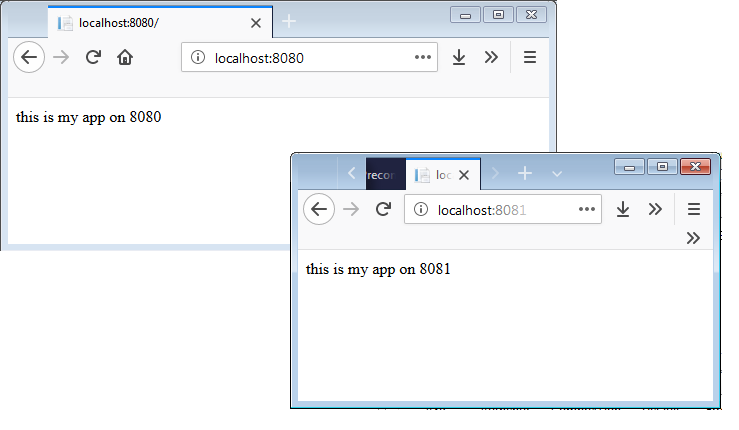
Beautiful! Now for the fun part. Go to your application within IIS and open the “URL Rewrite” section:

Click “Add Rule(s)…” and select “Reverse Proxy”. If you don’t see Reverse Proxy, you need to go back and install ARR (and perhaps reboot).
Now you can enter the address of one of your new sites, like so:
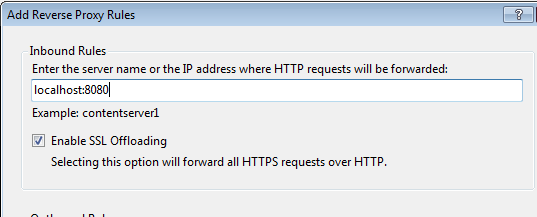
Click save, and you should now be able to open your existing application within IIS and see that you’re actually proxying all requests to one of your sites!
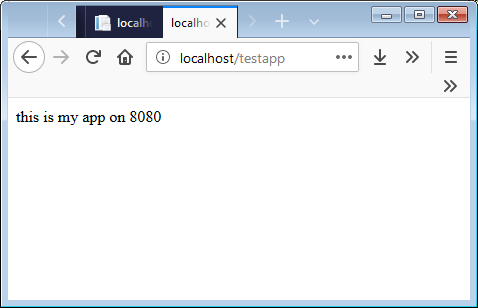
You can now change your reverse proxy to point towards 8081, simulating a live switchover. Just edit the rule within the IIS GUI and change the port number. Or, you can modify the generated web.config file yourself, which I find much easier. You’re looking for something like this:
<?xml version="1.0" encoding="UTF-8"?>
<configuration>
    <system.webServer>
        <rewrite>
            <rules>
                <rule name="ReverseProxyInboundRule1" stopProcessing="true">
                    <match url="(.*)" />
                    <action type="Rewrite" url="http://localhost:8080/testapp/{R:1}" />
                </rule>
            </rules>
        </rewrite>
    </system.webServer>
</configuration>
Just change that 8080 to 8081, hit reload in your browser, and marvel at the speed of the switchover! An important thing to note is to make sure that all 3 apps are running within their own Application Pool. You don’t want one of your apps to restart just because you’ve changed the reverse proxy rule.
Err... now what?
If you’re manually doing your deployments, you can follow these steps:
- Open the web.config file and check which port is currently live
- Deploy your app to the other instance.
- Test your changes on the other instance
- Change the web.config file to point towards the other instance
But please… please don’t manually do deployments!
Automate everything
Now that you’ve got it up and happening, you really, really want to automate the whole thing. It’s just too easy for it to go wrong. For this you want powershell, here’s a quick rough script that I’ve knocked up to work with the above example. I have tested this, and it’s working ok, but if I was you, I’d probably double check it all myself :)
This example is using MsDeploy for the deploy, just because it’s the lowest common denominator. However, I have found MsDeploy to be extremely difficult to use, clunky, error prone and the most bewildering bit of software I’ve seen in a long time. Check out Octopus Deploy (no I’m not sponsored by them, I just love the product) and you’ll never, ever, ever go back.
This script is also up on github if you’d like to contribute.
$msbuild = "C:\Program Files (x86)\MSBuild\14.0\Bin\MSBuild.exe"
$msDeploy = "C:\Program Files\IIS\Microsoft Web Deploy V3\msdeploy.exe"
$aspnetCompiler = "$env:windir\microsoft.net\framework64\v4.0.30319\aspnet_compiler.exe"

$mydir = (Get-Item -Path ".\" -Verbose).FullName
$outputPath = "$mydir\output"

$reverseProxyFile = "c:\testapp\web.config"
$testappUrl = "http://localhost/testapp"
$testapp1Url = "http://localhost:8080"
$testapp1Dir = "c:\testapp1"
$testapp2Url = "http://localhost:8081"
$testapp2Dir = "c:\testapp2"

# compile and build the package

Remove-Item $outputPath -Recurse -ErrorAction Ignore
&$msbuild /p:configuration=release /p:deployonBuild=true /p:DeployDefaultTarget=WebPublish /p:WebPublishMethod=FileSystem /p:publishurl="$outputPath" /verbosity:minimal
if ($LastExitCode -ne 0) { exit }


# check which instance is currently live by making a HTTP request to up.html

try
{
    echo "`nChecking $testapp1Url for up.html"
    $webRequestResult = (New-Object System.Net.WebClient).DownloadString("$testapp1Url/up.html")
    $deployInternalUrl = $testapp2Url
    $deployInternalUrlOld = $testapp1Url
    $deployDir = $testapp2Dir
    $deployDirOld = $testapp1Dir
}
catch
{
    $deployInternalUrl = $testapp1Url
    $deployInternalUrlOld = $testapp2Url
    $deployDir = $testapp1Dir
    $deployDirOld = $testapp2Dir
}

echo "`nDeploying to: $deployDir which is $deployInternalUrl"
echo "(Last deployed to: $deployDirOld which is $deployInternalUrlOld)`n"


# From here, deploy to $deployDir

&$msdeploy -verb:sync -source:contentPath="$outputPath" -dest:contentPath="$deployDir"

# Pre-compile our app to reduce application startup time:

echo "`nRunning the aspnet compiler in $deployDir`n"

try
{
    &$aspnetCompiler -v /$iisPath -p $deployDir -errorstack | write-host
}
catch [System.AppDomainUnloadedException]
{
    &$aspnetCompiler -v /$iisPath -p $deployDir -errorstack | write-host
}

# Check that the newly deployed app is up and running:

try
{
    echo "`nChecking $deployInternalUrl is responding ok`n"
    $webRequestResult = `
        (New-Object System.Net.WebClient).DownloadString($deployInternalUrl)
}
catch
{
    echo "Newly deployed app failed to startup properly, cancelling switchover"
    exit
}


# Modify reverse proxy file

echo "Updating reverse proxy config file $reverseProxyFile to point towards $deployInternalUrl`n"

$content = [Io.File]::ReadAllText($reverseProxyFile)
$updatedContent = $content -ireplace 'action type="Rewrite" url=".*"', `
    "action type=""Rewrite"" url=""$deployInternalUrl/{R:1}"""

Out-File -FilePath $reverseProxyFile -InputObject $updatedContent -Encoding UTF8

# Move the up file so that the next deploy works ok

echo "Moving uptime file from $deployDirOld\up.html to $deployDir\up.html"
move "$deployDirOld\up.html" "$deployDir\up.html"


# Make a request to the live URL just to make sure everything is ok:

echo "Making a request to $testappUrl to make sure everything is ok"
$webRequestResult = (New-Object System.Net.WebClient).DownloadString($testappUrl)

echo "`nDone!"
Gotcha!
Precompilation
Whenever an ASP.NET application is first accessed, the initial response will be sloooow. This is because ASP.NET needs to compile your views. You can work around this problem by pre-compiling your app! If you look at my above script you should be able to see this line:
$aspnetCompiler = <span style="color: #0000FF">"$env:windir\microsoft.net\framework64\v4.0.30319\aspnet_compiler.exe"</span>
&$aspnetCompiler -v /$iisPath -p $deployDir -errorstack | write-host
So what’s the gotcha? The problem that I had was sometimes the precompile step would throw a [System.AppDomainUnloadedException] exception. I think this is because IIS hadn’t finished restarting my application pool. My solution? Catch the exception and try it again :) So far it’s been working ok!
I believe you can also get MsBuild/MsDeploy to precompile your application as part of the build, so perhaps that’s another option to check out. There’s an obscure flag named PrecompileBeforePublish that doesn’t really seem to be documented anywhere but perhaps that’s an option.
There is also the aspnet_merge tool. This can be used to compile the output of a precompiled site to reduce the number of assemblies. I haven’t found it neccesary, but maybe it’s worth checking out.
WCF
If you’re using WCF (I know, I know), you need to remove the handler for the svc extension in your URLs in the reverse proxy config. Just add this handlers section to your web.config:
<?xml version="1.0" encoding="UTF-8"?>
<configuration>
    <system.webServer>
        <rewrite>
            <rules>
                <rule name="ReverseProxyInboundRule1" stopProcessing="true">
                    <match url="(.*)" />
                    <action type="Rewrite" url="http://localhost:8080/testapp/{R:1}" />
                </rule>
            </rules>
        </rewrite>
        <handlers>
            <remove name="svc-ISAPI-4.0_64bit" />
            <remove name="svc-ISAPI-4.0_32bit" />
            <remove name="svc-Integrated-4.0" />
        </handlers>
    </system.webServer>
</configuration>
So what’s the gotcha? You might need to also double check your binding configuration. If your internal site(s) are running under HTTP instead of HTTPS (or vice versa), you might need to re-examine the transport security config. Ergh, WCF.
Anti Forgery (ahem, Tokens)

If you’re using AntiForgery Tokens to protect against CSRF attacks you might come across another problem.
When you change your reverse proxy to point towards your other application instance, any existing users will be passing through the antiforgery token from the wrong app. This means that your requests will fail validation! So how do you work around this? You need to make sure that both applications use the same encryptionKey and validationKey.
These two keys are confusingly hidden inside a section within IIS named “Machine Keys”. However these keys are application level scoped, so they are nothing to do with your machine! So fire up IIS, and within the ASP.NET section find the machine keys icon:

Disable the automatically generate at runtime and Generate a unique key for each application, and go ahead and click the “Generate Keys” link:
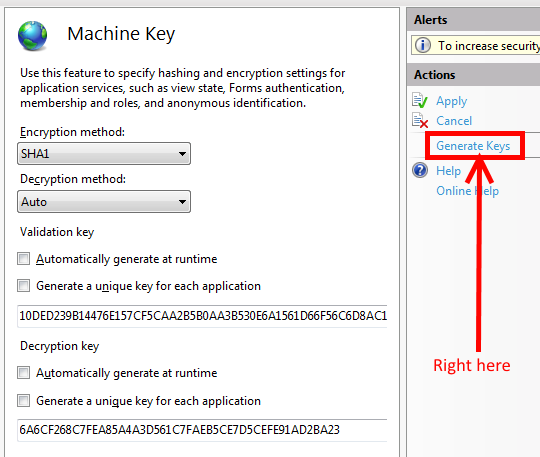
This should generate the following for your application’s web.config:
<?xml version="1.0" encoding="UTF-8"?>
  <system.web>
	  ...
    <machineKey decryptionKey="MyRandomlyGeneratedDecryptionKey" validationKey="ValidationKey" />
  </system.web>
Copy and paste this line to the other instance of your app. Done!
Database changes
Ever notice how articles expounding the virtues of automated deploy hardly ever talk about database schema changes?
This is a much bigger topic and deserves it’s own post, but I think we can narrow down our options to:
- Script all of your database changes and run them in as part of your deploy, using something like DbUp
- Use something like Entity Framework Migrations and have your application upgrade your DB
- Make all of your database changes backwards compatible with your new code, and run them separate to your deploy
I’ll be writing another article on this topic soon.
All done!
Do you think it’s worth moving to blue-green deployments? I’d love to hear from you and what problems you had. Hit me up below!