This is part two in a series of posts. For the introduction post on how to do it all with a NuGet package, see asp.net two factor auth with google authenticator app. This article is about how to implement it manually and how it works behind the scenes. A lot of this code is based on an article by Jerrie Pelser titled Using google authenticator with asp.net identity.
If you already have an application that is utilising ASP.NET’s identity service, you can made a few modifictions to include the Two Factor authentication code.
To show how this can be done, first off create a new ASP.NET application, choose “MVC”, and set authentication to “Individual User Accounts”. In this example we are creating a new application for managing our own movie DVD collection, so we will name it MovieManager.
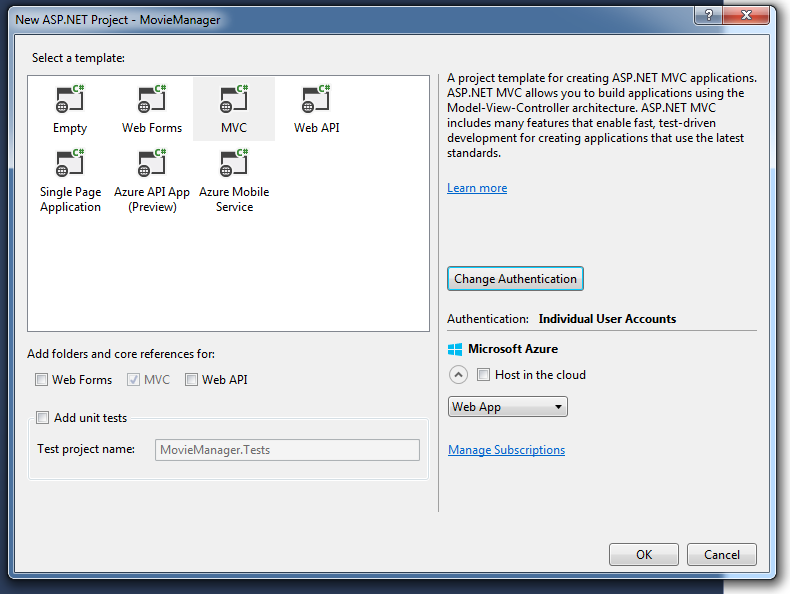 This will create a new web application that already has Registration and Login provided.
Configuring SQL Server
If you don’t already have a SQL Server DB, go ahead and create it:
CREATE DATABASE [moviemanager]
GO
and setup the user that you will connect as:
USE [master]
GO
CREATE LOGIN [moviemanageruser] WITH PASSWORD=N'moviemanagerpassword', DEFAULT_DATABASE=[moviemanager], CHECK_EXPIRATION=OFF, CHECK_POLICY=OFF
GO
USE [moviemanager]
GO
CREATE USER [moviemanageruser] FOR LOGIN [moviemanageruser]
GO
ALTER ROLE [db_owner] ADD MEMBER [moviemanager]
GO
Db_Owner
As you can see, we are granting the Db_Owner role to the user that our application will be connecting as. We need to do this so that the identity service (using entity framework code-first migrations) will create the tables necessary. This is a potential security hole - if we have a SQL injection vulnerability on our app someone could exploit it to have full access to our DB. They could even take a copy of our DB, or delete our DB, or even completely pown the machine if they are clever. To mitigate against this once the tables have been created we can revoke db_owner access.
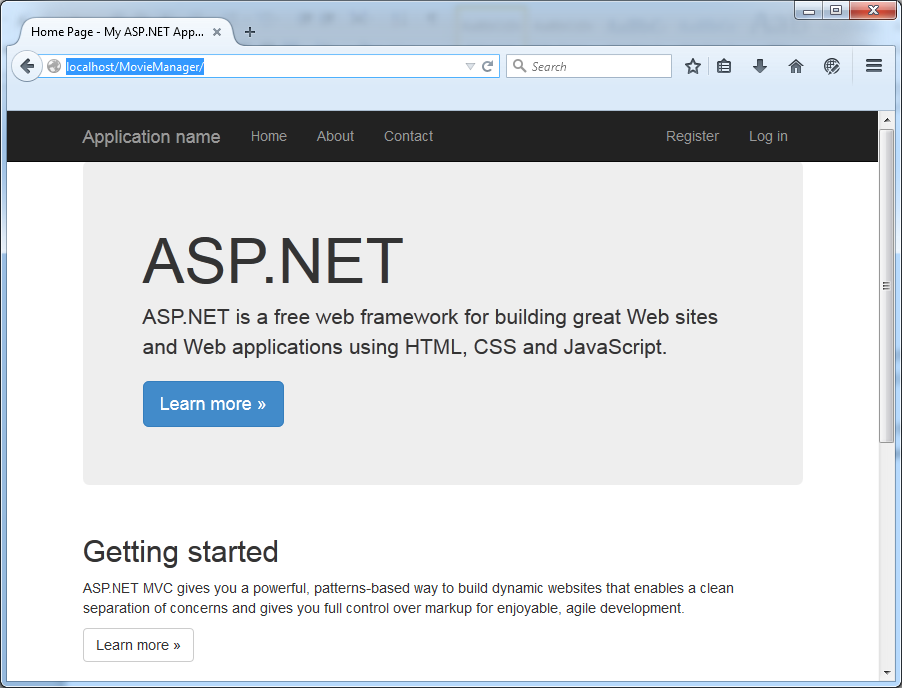
Now that we have our database created, we can open our application by hitting F5:
and we can register on the site:
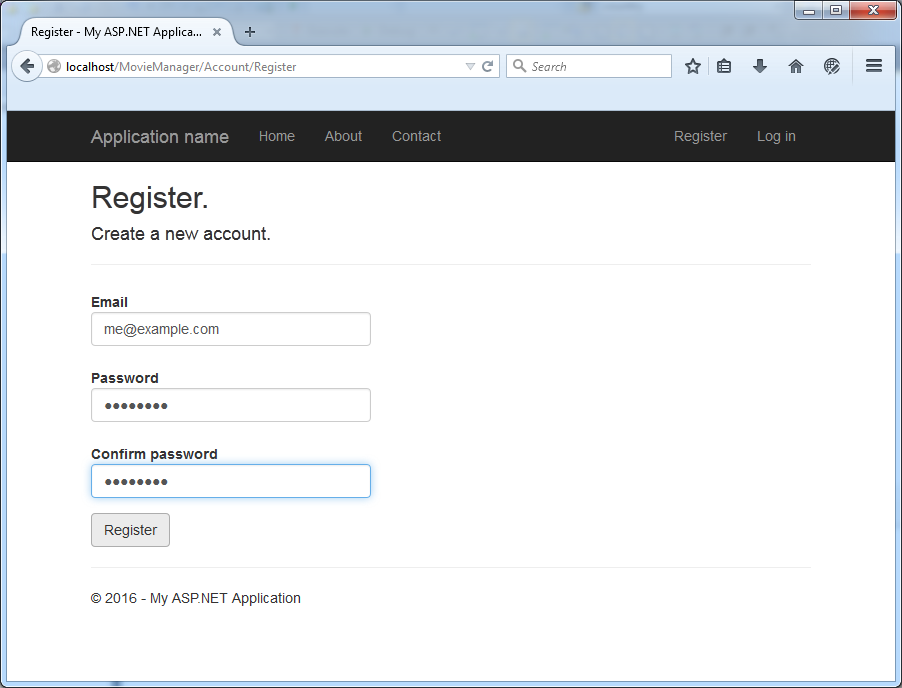
(Beware the draconian password complexity rules!)
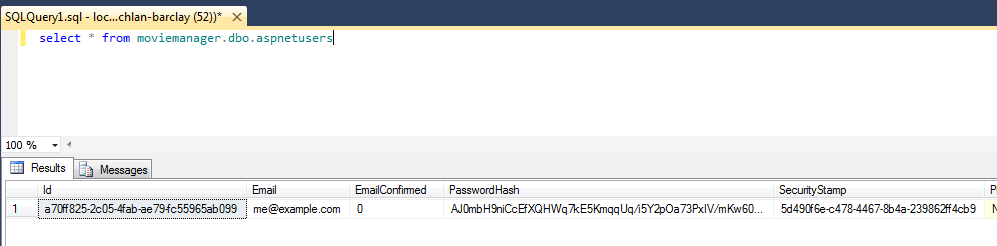
Hooray! We have successfully created a new login in our DB:
You can now go ahead and revoke db_owner access:
ALTER ROLE [db_owner] drop MEMBER MovieManagerUser
go
ALTER ROLE [db_datareader] ADD MEMBER MovieManagerUser
GO
ALTER ROLE [db_datawriter] ADD MEMBER MovieManagerUser
go
Or if you want to lock down this account even more:
ALTER ROLE [db_owner] drop MEMBER MovieManagerUser
go

GRANT SELECT ON moviemanager.dbo.AspNetRoles TO MovieManagerUser
GRANT UPDATE ON moviemanager.dbo.AspNetRoles TO MovieManagerUser
GRANT INSERT ON moviemanager.dbo.AspNetRoles TO MovieManagerUser

GRANT SELECT ON moviemanager.dbo.AspNetUserClaims TO MovieManagerUser
GRANT UPDATE ON moviemanager.dbo.AspNetUserClaims TO MovieManagerUser
GRANT INSERT ON moviemanager.dbo.AspNetUserClaims TO MovieManagerUser

GRANT SELECT ON moviemanager.dbo.AspNetUserLogins TO MovieManagerUser
GRANT UPDATE ON moviemanager.dbo.AspNetUserLogins TO MovieManagerUser
GRANT INSERT ON moviemanager.dbo.AspNetUserLogins TO MovieManagerUser

GRANT SELECT ON moviemanager.dbo.AspNetUserRoles TO MovieManagerUser
GRANT UPDATE ON moviemanager.dbo.AspNetUserRoles TO MovieManagerUser
GRANT INSERT ON moviemanager.dbo.AspNetUserRoles TO MovieManagerUser

GRANT SELECT ON moviemanager.dbo.AspNetUsers TO MovieManagerUser
GRANT UPDATE ON moviemanager.dbo.AspNetUsers TO MovieManagerUser
GRANT INSERT ON moviemanager.dbo.AspNetUsers TO MovieManagerUser
GO
You will now need to add two new columns in the DB:
ALTER TABLE moviemanager.dbo.aspnetusers add GoogleAuthenticatorSecretKey nvarchar(max) null
ALTER TABLE moviemanager.dbo.aspnetusers add IsGoogleAuthenticatorEnabled bit not null default(0)
We now have a baseline ASP.NET MVC application to which we can add Two Factor Authentication.
Adding Two Factor Authentication code
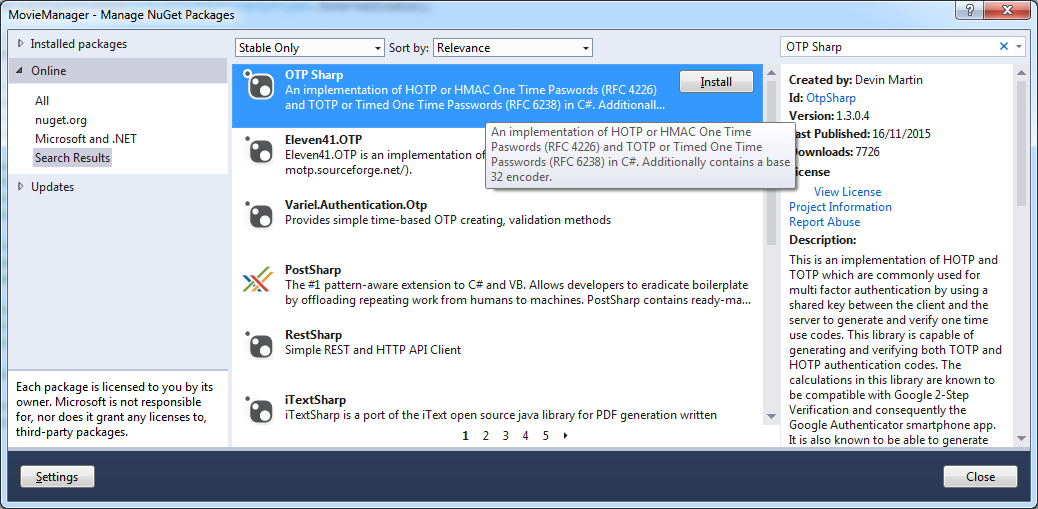
We start by adding the "OTP Sharp" (Nuget Id: OtpSharp) package using the package manager:
and add a new class named GoogleAuthenticatorTokenProvider.cs with the following:
using System;
using System.Collections.Generic;
using System.Linq;
using System.Web;

using Microsoft.AspNet.Identity;
using MovieManager.Models;
using System.Threading.Tasks;
using OtpSharp;
using Base32;

namespace MovieManager
{
    public class GoogleAuthenticatorTokenProvider:
        IUserTokenProvider<ApplicationUser, string>
    {
        public Task<string> GenerateAsync(
            string purpose,
            UserManager<ApplicationUser, string> manager,
            ApplicationUser user)
        {
            return Task.FromResult((string)null);
        }

        public Task<bool> ValidateAsync(
            string purpose,
            string token,
            UserManager<ApplicationUser, string> manager,
            ApplicationUser user)
        {
            long timeStepMatched = 0;

            byte[] decodedKey = Base32Encoder.Decode(user.GoogleAuthenticatorSecretKey);
            var otp = new Totp(decodedKey);
            bool valid = otp.VerifyTotp(
                token, out timeStepMatched, new VerificationWindow(2, 2));

            return Task.FromResult(valid);
        }

        public Task NotifyAsync(
            string token,
            UserManager<ApplicationUser, string> manager,
            ApplicationUser user)
        {
            return Task.FromResult(true);
        }

        public Task<bool> IsValidProviderForUserAsync(
            UserManager<ApplicationUser, string> manager,
            ApplicationUser user)
        {
            return Task.FromResult(user.IsGoogleAuthenticatorEnabled);
        }
    }
}
Code Modifications
The code generated by the ASP.NET identity template needs to be modified to support two factor auth, here's a full list of all of the changes needed. Remember that you can always use the NuGet package instead of doing this manually!
Models\IdentityModels.cs
Add two new properties:
public class ApplicationUser : IdentityUser
{
    public bool IsGoogleAuthenticatorEnabled { get; set; }
    public string GoogleAuthenticatorSecretKey { get; set; }
App_Start\IdentityConfig.cs
Removing the two lines that register the phone code and email code providers:
manager.RegisterTwoFactorProvider("Phone Code",
    new PhoneNumberTokenProvider<ApplicationUser>
{
    MessageFormat = "Your security code is {0}"
});
manager.RegisterTwoFactorProvider("Email Code",
    new EmailTokenProvider<ApplicationUser>
{
    Subject = "Security Code",
    BodyFormat = "Your security code is {0}"
});
and instead, replace them with our new google authenticator provider:
manager.RegisterTwoFactorProvider(
"Google Authenticator", new GoogleAuthenticatorTokenProvider { });
Views\Manage\Index.cshtml
    <dt>
        Google Authenticator:
    </dt>
    <dd>
        @if (Model.IsGoogleAuthenticatorEnabled)
        {
            @Html.ActionLink("[Disable]", "DisableGoogleAuthenticator")
        }
        else
        {
            @Html.ActionLink("[Enable]", "EnableGoogleAuthenticator")
        }
    </dd>
and now to implement the code that is called when the user clicks "Disable" or "Enable", and also populate the IsGoogleAuthenticatorEnabled flag:
ManagerController.cs
Add the following section to Index:
public async Task<ActionResult> Index(ManageMessageId? message)
{

     ...

     var userId = User.Identity.GetUserId();
            var user = await UserManager.FindByIdAsync(userId);

            var model = new IndexViewModel
            {
                HasPassword = HasPassword(),
                PhoneNumber = user.PhoneNumber,
                TwoFactor = user.TwoFactorEnabled,
                Logins = await UserManager.GetLoginsAsync(userId),
                BrowserRemembered = await
                    AuthenticationManager.TwoFactorBrowserRememberedAsync(userId),
                IsGoogleAuthenticatorEnabled = user.IsGoogleAuthenticatorEnabled
            };

}
And add these two functions:
public async Task<ActionResult> DisableGoogleAuthenticator()
{
    var user = await UserManager.FindByIdAsync(User.Identity.GetUserId());
    if (user != null)
    {
        user.IsGoogleAuthenticatorEnabled = false;
        user.GoogleAuthenticatorSecretKey = null;
        user.TwoFactorEnabled = false;

        await UserManager.UpdateAsync(user);
    }
    return RedirectToAction("Index", "Manage");
}

[HttpGet]
public ActionResult EnableGoogleAuthenticator()
{
    byte[] secretKey = KeyGeneration.GenerateRandomKey(20);
    string userName = User.Identity.GetUserName();
    string issuer = "DevMovieManager";
    string issuerEncoded = HttpUtility.UrlEncode(issuer);
    string barcodeUrl = KeyUrl.GetTotpUrl(secretKey, userName) + "&issuer=" + issuerEncoded;

    var model = new GoogleAuthenticatorViewModel
    {
        SecretKey = Base32Encoder.Encode(secretKey),
        BarcodeUrl = barcodeUrl
    };

    return View(model);
}
Startup.Auth.cs
Remove the call to app.UseExternalSignInCookie().
AccountController.cs
There are many changes needed to be made to AccountController. You will be implementing the following functionality:
- When a user logs in, don't make them select a two factor authenticator provider if there is only one
- Lock a user's account after 5 invalid login attempts
- When registering, send an email to the user so they can verify their email address
- Lock out users who haven't validated their email address
- Add code so that if in DEBUG mode we can validate an email address easily
To get started, add the following functions:
// GET: /Account/SendCode
[AllowAnonymous]
public async Task<ActionResult> SendCode(string returnUrl, bool rememberMe)
{
 ...
    var userFactors = await UserManager.GetValidTwoFactorProvidersAsync(userId);

    // If there's only one provider, don't make the user select it
    if (userFactors.Count == 1)
    {
        return RedirectToAction("VerifyCode", new {
            Provider = userFactors[0],
            ReturnUrl = returnUrl,
            RememberMe = rememberMe });
    }

    ...
}

public async Task<ActionResult> Login(LoginViewModel model, string returnUrl)
{
    if (!ModelState.IsValid)
    {
        return View(model);
    }

    // Make login failures count towards account lockout (??)
    var result = await SignInManager.PasswordSignInAsync(model.Email, model.Password, model.RememberMe, shouldLockout: true);
    switch (result)
    {
        case SignInStatus.Success:
            return RedirectToLocal(returnUrl);
        case SignInStatus.LockedOut:
            return View("Lockout");
        case SignInStatus.RequiresVerification:
            return RedirectToAction("SendCode", new { ReturnUrl = returnUrl, RememberMe = model.RememberMe });
        case SignInStatus.Failure:
        default:
            ModelState.AddModelError("", "Invalid login attempt.");
            return View(model);
    }
}

[HttpPost]
[AllowAnonymous]
[ValidateAntiForgeryToken]
public async Task<ActionResult> Register(RegisterViewModel model)
{
    if (ModelState.IsValid)
    {
        var user = new ApplicationUser { UserName = model.Email, Email = model.Email };
        var result = await UserManager.CreateAsync(user, model.Password);
        if (result.Succeeded)
        {
            string code =
                await UserManager.GenerateEmailConfirmationTokenAsync(user.Id);

            var callbackUrl =
                Url.Action("ConfirmEmail", "Account", new { userId = user.Id, code = code }, protocol: Request.Url.Scheme);

            await UserManager.SendEmailAsync(
                user.Id,
                "Confirm your account",
                "Please confirm your account by clicking <a href=\"" + callbackUrl + "\">here</a>");

#if DEBUG
            TempData["ViewBagLink"] = callbackUrl;
#endif

            ViewBag.Message = "Please check your email and confirm your account, as you must be confirmed "
                            + "before you can log in.";

            return View("Info");
        }
        AddErrors(result);
    }

    // If we got this far, something failed, redisplay form
    return View(model);
}</code> </pre>

<p>You will also need to add this function:</p>


```c#
[AllowAnonymous]
public ActionResult UnconfirmedEmail()
{
    ResendValidationEmailViewModel ViewModel = new ResendValidationEmailViewModel();
    if (TempData["UserId"] != null)
    {
        int userId = (int)TempData["UserId"];
        ViewModel.UserId = userId;
    }
    return View(ViewModel);
}
You should also remove the following functions:
ExternalLoginCallback()
ExternalLoginConfirmation()
ExternalLoginFailure()
ExternalLogin()
ResendValidationEmailViewModel.cs
public class ResendValidationEmailViewModel
    {
        public int? UserId { get; set; }
        public string CallbackUrl { get; set; }
    }
UnconfirmedEmail.cshtml
@model ResendValidationEmailViewModel
@{
    ViewBag.Title = "Unconfirmed Email";
    Layout = null;
}

<h2>@ViewBag.Title</h2>
<p>Your email address has not been confirmed. Please check your inbox and/or your spam folder for a validation email.</p>
<pre>@if (Model.UserId.HasValue)
{
    using (Html.BeginForm("ResendValidationEmail", "Account", FormMethod.Post, new { id = "resendValidationForm", @class = "navbar-right" }))
    {
        @Html.AntiForgeryToken()
        @Html.HiddenFor(x => x.UserId)
    }
    <a href="javascript:document.getElementById('resendValidationForm').submit()">Re-send validation email</a>
}
Info.cshtml
@{
    ViewBag.Title = "Thank you";
}

<h2>@ViewBag.Title.</h2>

<p>@ViewBag.Message</p><br />

@if (TempData["ViewBagLink"] != null) {
    <p>
        Or you could just use <a href="@TempData["ViewBagLink"]">this link</a>.
    </p>
}</code>
</pre>


<h3>IdentityConfig.cs</h3>


<p>Remove the two lines:</p>


```c#
manager.RegisterTwoFactorProvider("Phone Code", ...
manager.RegisterTwoFactorProvider("Email Code", ...
Generating the QR Code
To generate the QR code we will be using Jerome Etienne's JQuery QR code generator. Simply download jquery.qrcode.min.js , add it to your Scripts folder, and then add it to your jquery bundle:
public class BundleConfig
{
    // For more information on bundling, visit http://go.microsoft.com/fwlink/?LinkId=301862
    public static void RegisterBundles(BundleCollection bundles)
    {
        bundles.Add(new ScriptBundle("~/bundles/jquery").Include(
            "~/Scripts/jquery-{version}.js", "~/Scripts/qrcode.js"));
Manager\EnableGoogleAuthenticator.cshtml
We now need to add a page that generates a QR code:
@model MovieManager.Controllers.GoogleAuthenticatorViewModel
@{
    ViewBag.Title = "Enable Google Authenticator";
}
<div class="row">
    <div class="col-md-8">
        <h3>1. Add Movie Manager to Google Authenticator</h3>
        <p>Open Google Authenticator and add Movie Manager   by scanning the QR Code to the right.</p>
        <h3>2. Enter the 6 digit code that Google  Authenticator generates</h3>

        <p>Verify that Movie Manager is added correctly in Google Authenticator by entering the 6 digit code which Google Authenticator generates for Movie Manager below, and then click Enable. </p>

        @using (Html.BeginForm(
            "EnableGoogleAuthenticator",
            "Manage",
            FormMethod.Post,
            new { @class = "form-horizontal", role = "form" }))
        {
            @Html.AntiForgeryToken()
            @Html.ValidationSummary(false)
            @Html.HiddenFor(m => m.SecretKey)
            @Html.HiddenFor(m => m.BarcodeUrl)
            <div class="form-group">
                @Html.LabelFor(m => m.Code, new { @class = "col-md-2 control-label" })
                <div class="col-md-10">
                    @Html.TextBoxFor(m => m.Code, new { @class = "form-control", autocomplete="off" })
                </div>
            </div>
            <div class="form-group">
                <div class="col-md-offset-2 col-md-10">
                    <input type="submit" class="btn btn-default" value="Enable" />
                </div>
            </div>
        }
    </div>
    <div class="col-md-4">
        <br /><br />
        <div id="qrcode" style="width: 200px"></div>
    </div>
</div>

@section Scripts {
    @Scripts.Render("~/bundles/jqueryval")

    <script>

        var barcodeUrl = "@Html.Raw(Model.BarcodeUrl)";

        $(function () {
            var qrcode = new QRCode("qrcode", {
                text: barcodeUrl,
                width: 200,
                height: 200,
                colorDark: "#000000",
                colorLight: "#ffffff",
                correctLevel: QRCode.CorrectLevel.H
            });
            $("#Code").focus();
        });

    </script>
}
Enabling Two Factor Authentication
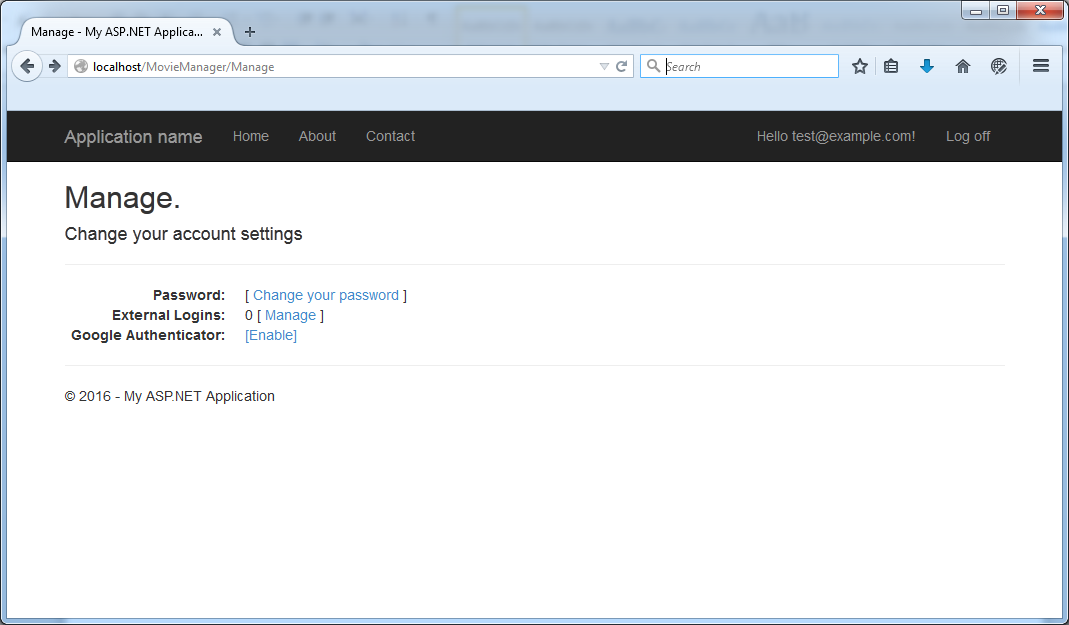
You should now be able to enable google's authenticator within the "Manage" section:
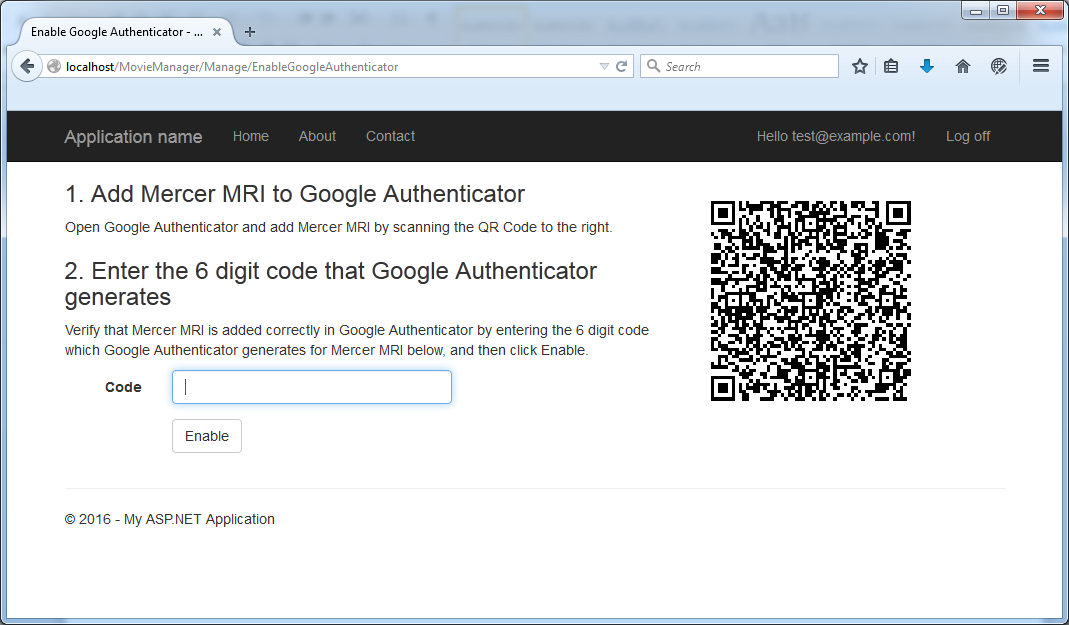
and then by clicking "Enable" you are prompted to scan the QR code:
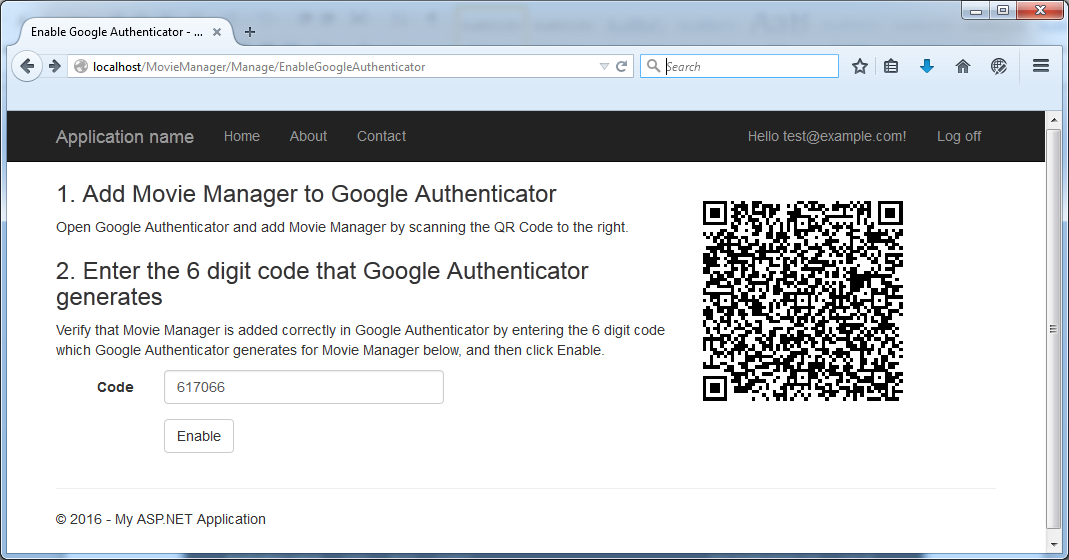
Scanning the QR code then will give you a login code within the app:

entering this code will enable two factor authentication for your account:
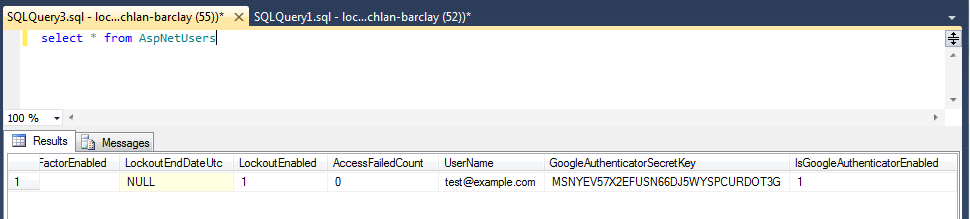
And you can see in the DB that your Google Key is in the DB:
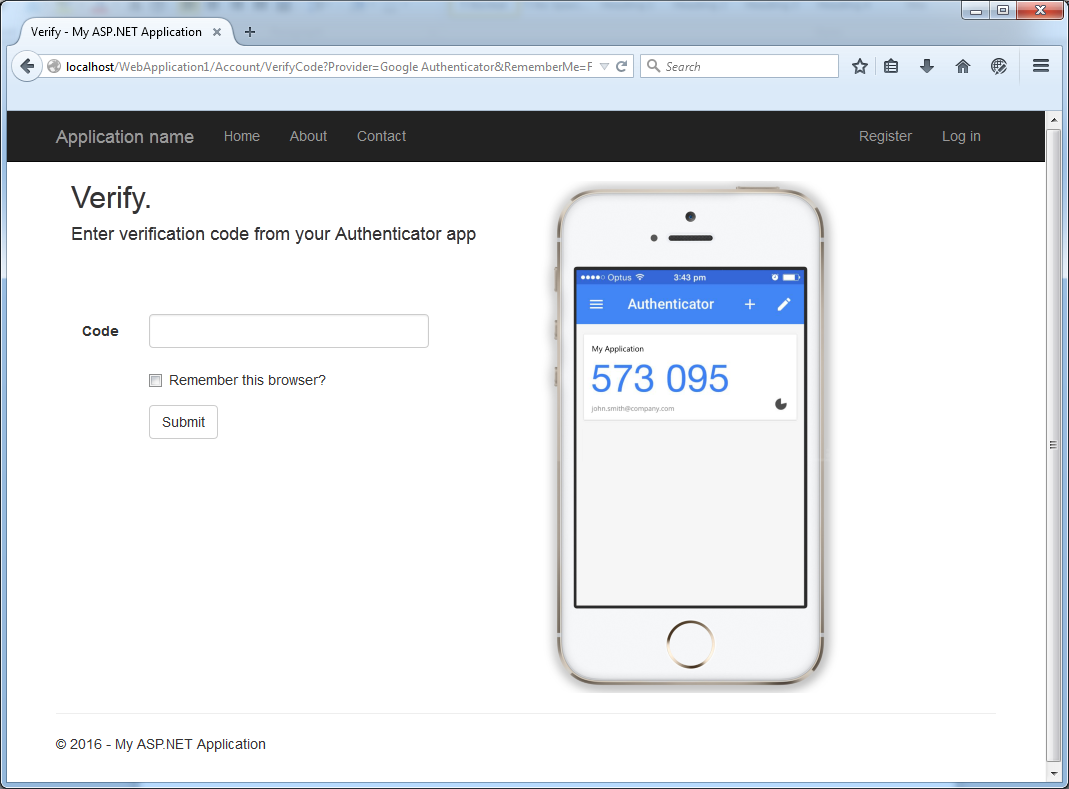
Great! We can now log into our application and we should be prompted to enter our two-factor code:
This is by no means a perfect solution so I'd love to hear your feedback. Have you implemented two factor auth in your asp.net app?