Within your organisation you probably have shared code that is common across multiple projects? You know, code that does boring stuff like sending an email, error message logging or generating a nice bit of HTML.
So the question is, How do you manage that code? Do you:
- Copy around code files to multiple projects
- Factor out your common code to a new project and include that project in many solutions
- Compile down your common project into a DLL and copy that around
- Use revision control to import particular versions of common libraries
All of these solutions work, but when it comes to keeping your common code up to date, and knowing which versions are used by which applications, you’re going to start running into problems.
Enter, NuGet!
But isn’t NuGet what Visual Studio uses for managing external, public packages? Yes it is. But did you know you can host your own private NuGet repository, create your own packages, and host them internally within your own network?
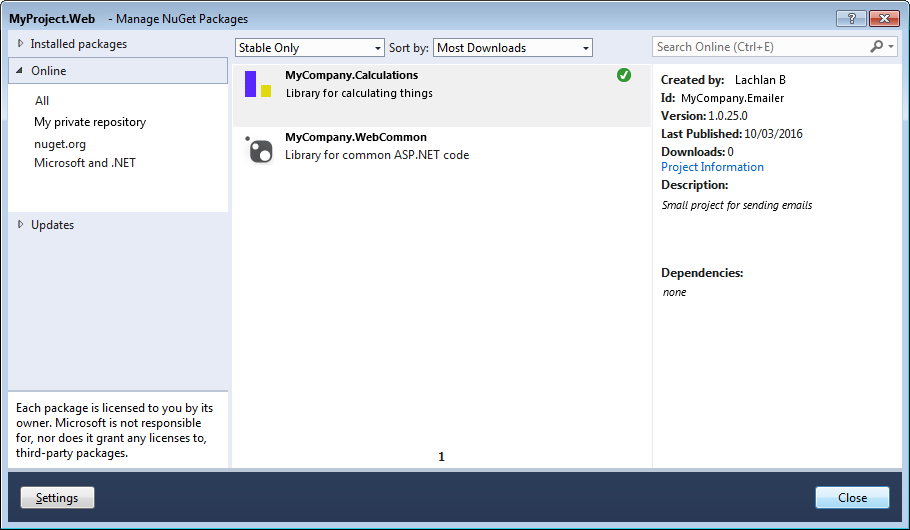
It’s all quite easy to setup, and once you do, you’ll end up with something like so:
Setting it up
The first thing that you want to do is to create a NuGet package for some of your common code. Let’s take a sample bit of code that we use to send emails:
using System;
using System.Net.Mail;

namespace MyCompany.WebCommon
{
    /// <summary>
    /// Contains code to send a HTML email using SMTP
    /// </summary>
    public class Emailer
    {
        /// <summary>
        /// Contains the error message if SendMail fails
        /// </summary>
        public string Error { get; private set; }

        /// <summary>
        /// Sends an email, returns false if failed
        /// </summary>
        /// <param name="emailAddress">Email address to send to - only one address allowed</param>
        /// <param name="subject">Subject line of email</param>
        /// <param name="emailBodyHtml">Contents of email - make sure to escape any HTML</param>
        /// <param name="emailFrom">Email address the email comes from (can be anything)</param>
        /// <param name="smtpServerName">Smtp server name</param>
        /// <returns>boolean indicating email was sent (not neccesarily delivered)</returns>
        public bool SendEmail(
            string emailAddress,
            string subject,
            string emailBodyHtml,
            string emailFrom,
            string smtpServerName = "localhost")
        {
            SmtpClient Smtp_Server = new SmtpClient();
            MailMessage e_mail = new MailMessage();
            Smtp_Server.Host = smtpServerName;

            e_mail = new MailMessage();
            e_mail.From = new MailAddress(emailFrom);
            e_mail.To.Add(emailAddress);
            e_mail.Subject = subject;
            e_mail.IsBodyHtml = true;
            e_mail.Body = emailBodyHtml;

            try
            {
                Smtp_Server.Send(e_mail);
            }
            catch (Exception e)
            {
                this.Error = e.ToString();
                return false;
            }
            return true;
        }
    }
}
Let’s say that we are sending emails from five different applications, and we wish to reuse this code across all them.
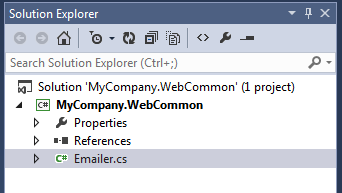
First off, create your solution, add the above class and then compile your project. You should have something like this:
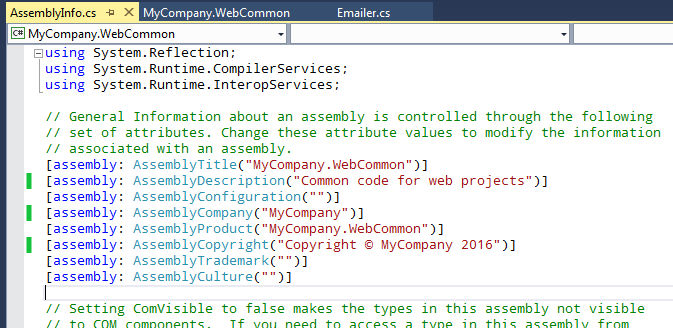
Two important points to note. The first one is that you want to edit your Properties/AssemblyInfo.cs file and enter a description for your assembly. You also want to update the Company name, Title and Author if it’s not correct.
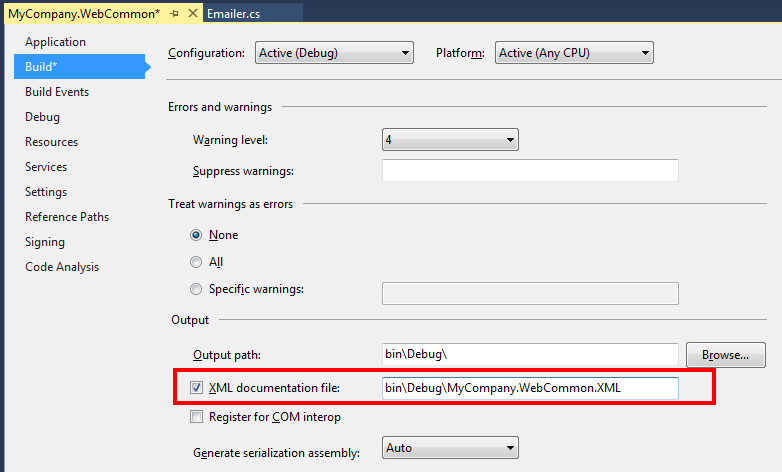
The second point to note is to make sure you enable XML comment file generation so that once you have installed your NuGet package, you will receive intellisense! Make sure to change the extension .XML to lower case!
Great. Now we have our project all ready to be nugetified. Next, install the NuGet Command line tools. Then within the command line, move to the directory where your .csproj file is and enter the following command:
nuget spec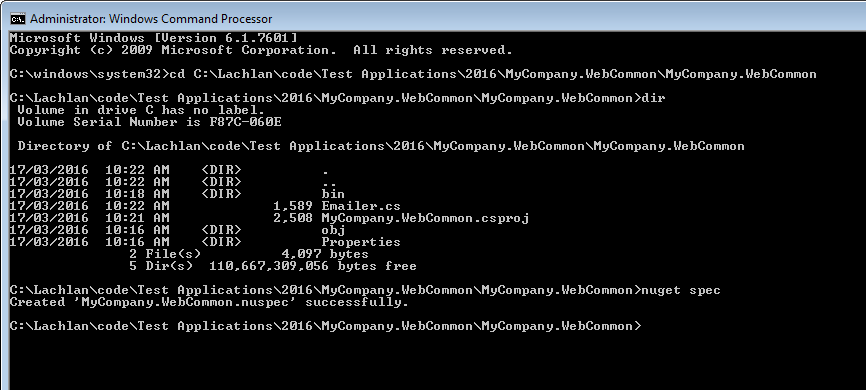
This will create a new file named MyCompany.WebCommon.nuspec, and it should look something like the following:
<?xml version="1.0"?>
<package >
  <metadata>
    <id>$id$</id>
    <version>$version$</version>
    <title>$title$</title>
    <authors>$author$</authors>
    <owners>$author$</owners>
    <requireLicenseAcceptance>false</requireLicenseAcceptance>
    <description>$description$</description>
    <projectUrl>http://myserver/wiki/MyCompany.WebCommon.html</projectUrl>
    <releaseNotes>Initial release of code library to send emails</releaseNotes>
    <copyright>Copyright 2016</copyright>
    <tags>MyCompany Web Common Emailer Emails</tags>
  </metadata>
</package>
This file is used by NuGet to create your package (which we will do in a sec).
It’s all pretty straightforward, except for the $ tags . You can remove all of these and hard code the values if you wish, but if you leave them as is, NuGet will automatically look at your AssemblyInfo.cs file and pull out your assembly’s meta data, and insert it directly into your NuGet package! This might seem strange but after a few changes you’ll see how well it works.
Now Make sure you have already compiled your project, and then issue the following command:
NuGet Pack

This will create a new file named MyCompany.WebCommon.1.0.0.0.nupkg - woo your first package.
Now that you have your NuGet package, you can add it to your application that needs to send emails!
Setting up your private NuGet server
In order to add your NuGet package to a new project, Visual Studio need to know where your NuGet package is located. You have one of two options:
*Publish your code package to the PUBLIC nuget.org website *Publish your code package to your own private NuGet repository
Let’s do option #2!
Well, you might as well just read the official article on the NuGet website.
Now that you’ve got your own private NuGet repo up and running, simply add it as a new package source within Visual Studio, by going to: Tools -> options -> NuGet Package Manager -> Package Sources
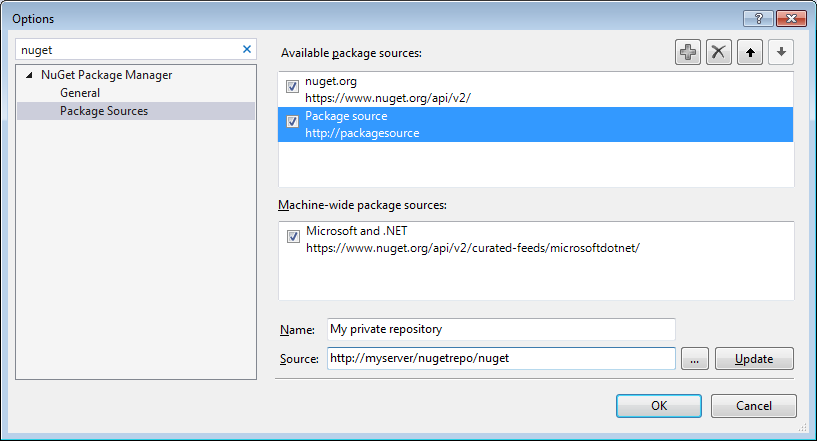
Something very important to note is to add /nuget onto the end of your virtual application name!
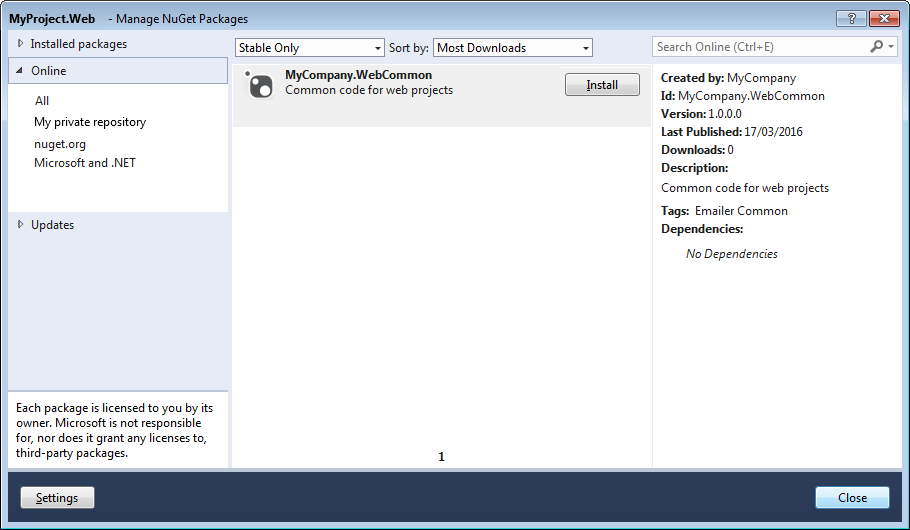
And you can now add the package to your project! Right click on your project, select Manage NuGet packages and you should see:
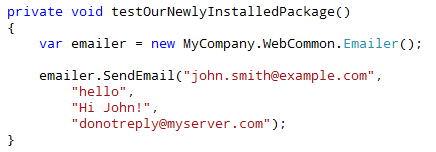
Usage of this code is pretty straight forward:
Updating your package
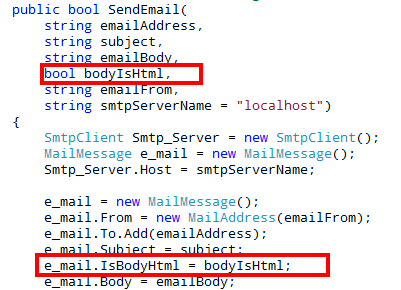
The cool part is that it’s very easy to view which packages are out of date and to see what’s changed. Let’s make a change to our SendEmail() function, by adding a new parameter named IsHtml:
To update our NuGet package we simply update the AssemblyVersion and AssemblyFileVersion attributes to 1.1 (in the AssemblyInfo.cs file), recompile our project, and re-build our nuget package by the same command, “nuget pack”:
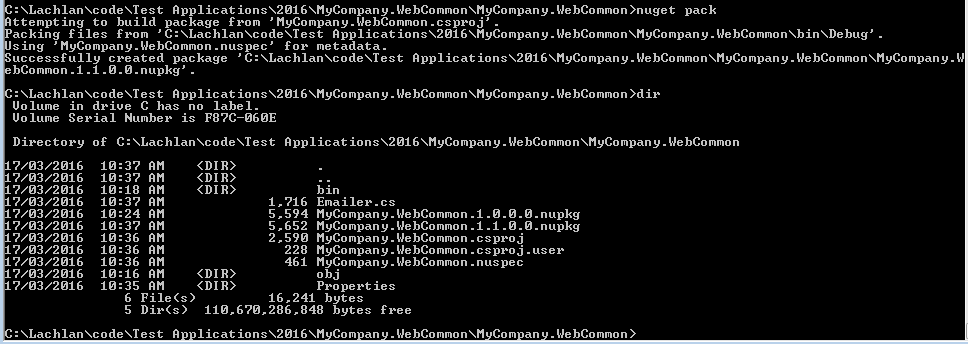
The new package has the 1.1 version number at the end. This means we can publish it to our repository and not lose our earlier version. It also means that once published, it’s easy to update your code to use the new package. Simply right click on your project and go to Manage NuGet packages, and then click on the “Updates” section. From here you can see what packages have been updated along with it’s release notes:
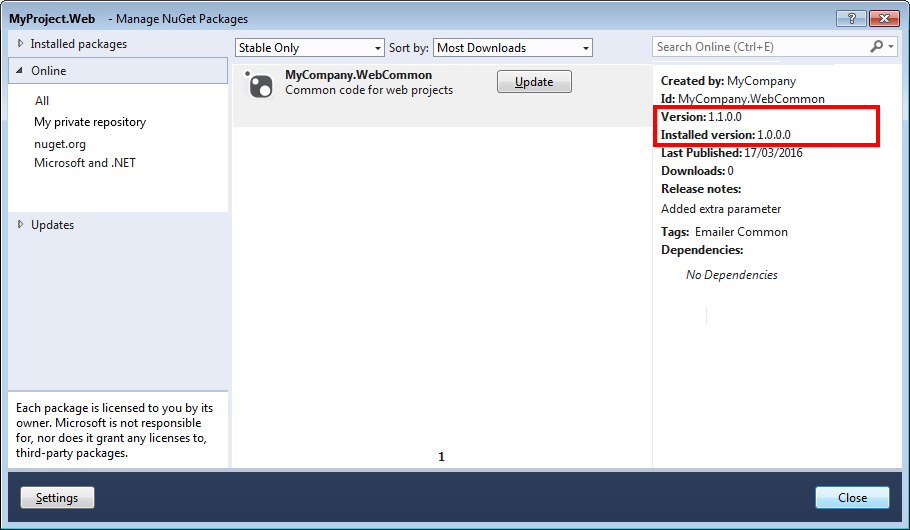
Clicking update will update the package, and we can now pass through our new IsHtml parameter!

Debugging
Unless you create a debug nuget package PLUS a release nuget package, and flick between them whenever your ready to do a release (or perhaps use multiple nuget repositories) - things get a bit fiddly. There’s currently no way of including multiple builds of a DLL within the one package, which is annoying. There are numerous workarounds for this problem.
I’ve found the best way is to manually remove the package, add the project to your solution and then get things working. Then once things are ok, remove the project, update the package and update your project. Not a heap of fun but it works.
Does this method work for you? How do you share your code packages around in .NET?